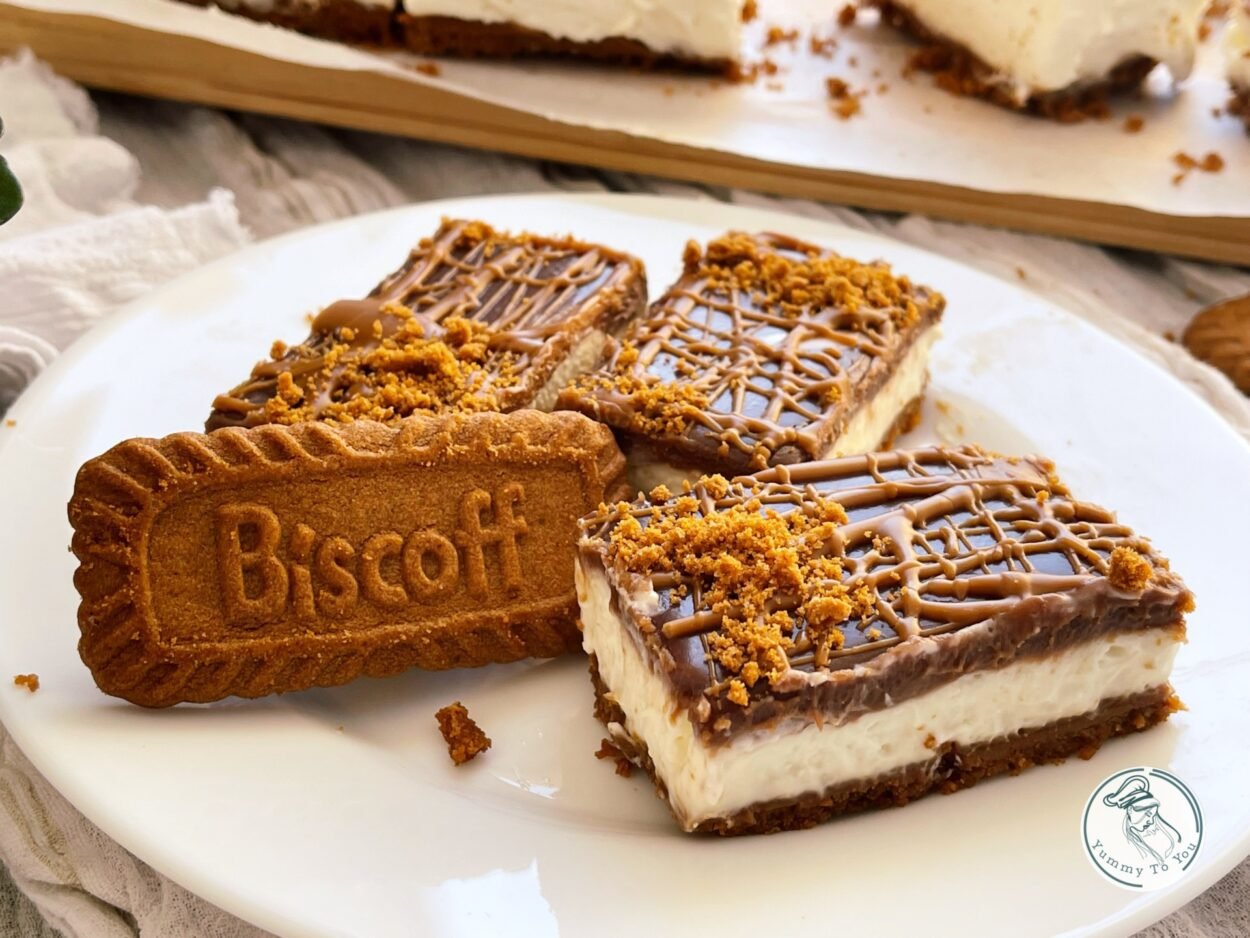
No-bake Biscoff cake with chocolate – creamy layers and absolutely irresistible
No-bake Biscoff cake with crunchy biscuit layers, Biscoff cream, cream cheese filling, and chocolate glaze.
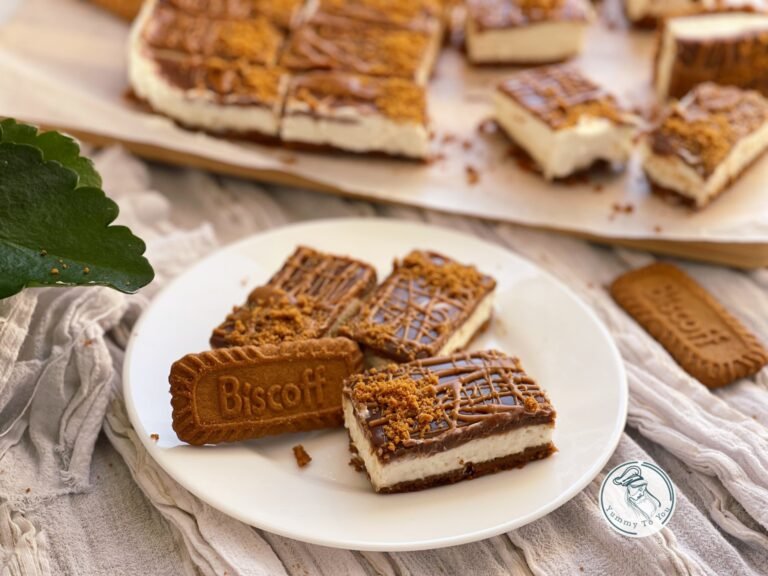
No-bake Biscoff cake with chocolate
Course: DessertCuisine: InternationalDifficulty: Easy, Usor16
servings30
minutes4
hours450
kcal4
hours30
minutesWe probably all have that go-to “recipe list” of impressive no-bake desserts that don’t require hours in the kitchen. This Biscoff cake fits perfectly into that category.
We start with a crunchy biscuit layer, continue with that unmistakable Biscoff cream, add a smooth layer of cream cheese, and finish everything with a glossy chocolate topping. In short, a layered dessert that slices perfectly and looks like it came straight from a modern pastry shop display.
It’s the kind of cake you make once and then keep coming back to whenever you want something quick but with maximum impact. Let’s see how easy it is to prepare.
Ingredients
- For the base:
250 g Biscoff biscuits
100 g melted butter
- For the Biscoff layer:
~300 g Biscoff spread
- For the cream layer:
200 g cream cheese
2–3 tablespoons powdered sugar (optional, to taste)
250 ml cream
vanilla
- For the final layer:
150–200 g chocolate
100 ml heavy whipping cream
- For decoration:
~50 g Biscoff spread
2–3 Biscoff biscuits
Preparation method:
- For this cake, we need simple ingredients that together create a spectacular dessert with contrasting textures and an intense Biscoff flavor.

- For the base, we need Biscoff biscuits, which we finely crush until we get a sand-like texture. We add the melted butter and mix until the mixture becomes smooth and slightly moist. We press it into a small pan lined with baking paper or foil, forming an even layer. We refrigerate it for about 10 minutes so the base can set.
- For the Biscoff layer, we gently warm the spread until it becomes more fluid and easy to spread. We pour it over the chilled base and carefully smooth it out. We place it back in the refrigerator for 10–15 minutes to set.
- For the cream layer, we mix the cream cheese until it becomes smooth and creamy. We can add powdered sugar to taste, depending on how sweet we want the dessert. We spread the cream over the Biscoff layer in an even layer and smooth it out for a clean finish.
- For the final layer, we melt the chocolate together with the heavy whipping cream until we get a smooth and glossy ganache. We pour it over the cake and smooth it out, or, if we want a more modern look, we can lightly create a swirl effect.
We refrigerate the cake for 3–4 hours or, ideally, overnight, until it fully sets and can be cut into perfect slices. - Before slicing, we can add a drizzle of Biscoff spread on top for extra flavor and an even more appetizing look.
It’s creamy, slightly crunchy at the base, and perfectly balanced between sweetness and the intense flavor of Biscoff and chocolate. It pairs wonderfully with coffee or as a dessert on a festive platter. - Tips
For the cleanest slices, use a sharp knife dipped in hot water and wiped dry after each cut. We can adjust the amount of sugar in the cream cheese layer depending on preference, especially since Biscoff is already quite sweet. If we want a more intense contrast, we can use slightly dark chocolate for the final layer.